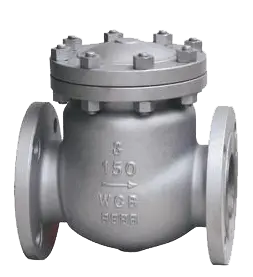
Preliminary Preparation
1. Safety Measures
Ensure the work area is safe by shutting off the main valve of the relevant pipeline system to cut off fluid flow and prevent accidents.2. Tool Preparation
Prepare the necessary tools, such as wrenches, screwdrivers, pipe pliers, lubricants, and new valve discs (if replacement is needed).3. Inspection and Assessment
First, inspect the condition of the check valve disc to determine whether it needs repair or replacement. If the disc is only slightly worn or stuck, it may only require cleaning and lubrication. If the disc is severely damaged or irreparable, a new valve disc will need to be installed.Repair Steps (for Repairable Situations)
1. Disassemble the Valve Disc
Using appropriate tools, carefully disassemble the check valve disc according to the manufacturer's instructions or maintenance manual. Take care to avoid damaging other components.2. Clean and Inspect
Thoroughly clean the removed valve disc to remove dirt, rust, and impurities. Inspect the sealing surface of the disc for flatness, wear, or scratches. If the sealing surface is severely damaged, the entire valve disc may need to be replaced.3. Repair or Replace
If the valve disc is only slightly worn or sticking, use sandpaper or grinding tools to repair the sealing surface, then apply an appropriate amount of lubricant. If the valve disc cannot be repaired, replace it with a new one.4. Reinstall
Reinstall the repaired or new valve disc into the check valve, ensuring correct installation and proper fastening.
Replacement Steps (for Cases Requiring Replacement)
1. Remove the Old Valve Disc
Follow the disassembly steps outlined in the maintenance procedure above.2. Prepare the New Valve Disc
Select a new valve disc that matches the original one, ensuring that its material, specifications, and sealing performance meet the requirements.3. Install the New Valve Disc
Install the new valve disc into the check valve, paying attention to the correct installation direction and position. During installation, you may need to adjust the position or angle of the valve disc to ensure it opens and seals properly.4. Test and Adjust
After installation, test the check valve to verify that it opens and seals correctly. If any issues are found, make necessary adjustments and repairs promptly.Precautions
1. Follow Operating Guidelines
Adhere to the manufacturer’s operating instructions and safety requirements when repairing or replacing the check valve disc.2. Use Appropriate Tools
Choose the correct tools for disassembly and installation to avoid damaging components with improper tools.3. Ensure Sealing Performance
When reinstalling the valve disc, ensure that the sealing surfaces are clean and free of debris, and apply an appropriate amount of lubricant to enhance sealing performance.4. Test and Verify
After completing the repair or replacement, conduct thorough testing and verification to ensure the check valve operates correctly and meets system requirements.Repairing or replacing the check valve disc requires a tailored approach based on the specific situation but generally involves preparation, repair or replacement steps, and considerations. Throughout the process, it is crucial to follow relevant guidelines and safety requirements to ensure smooth execution and achieve the desired outcome.
